For the complete documentation index, see llms.txt. This page is also available as Markdown.

Stage 2 · Settings

Entering Settings starts the pipeline — the sensor-data processing system — in preview mode. The sensors stream, but nothing is broadcast yet.

Give it 5–15 seconds to warm up — the view may look empty for a moment.

For the first setup, complete Set capture zones, learn the empty stage in Post processing, then configure OSC output. Leave optional tuning at its current values until your first output is confirmed.

Set capture zones

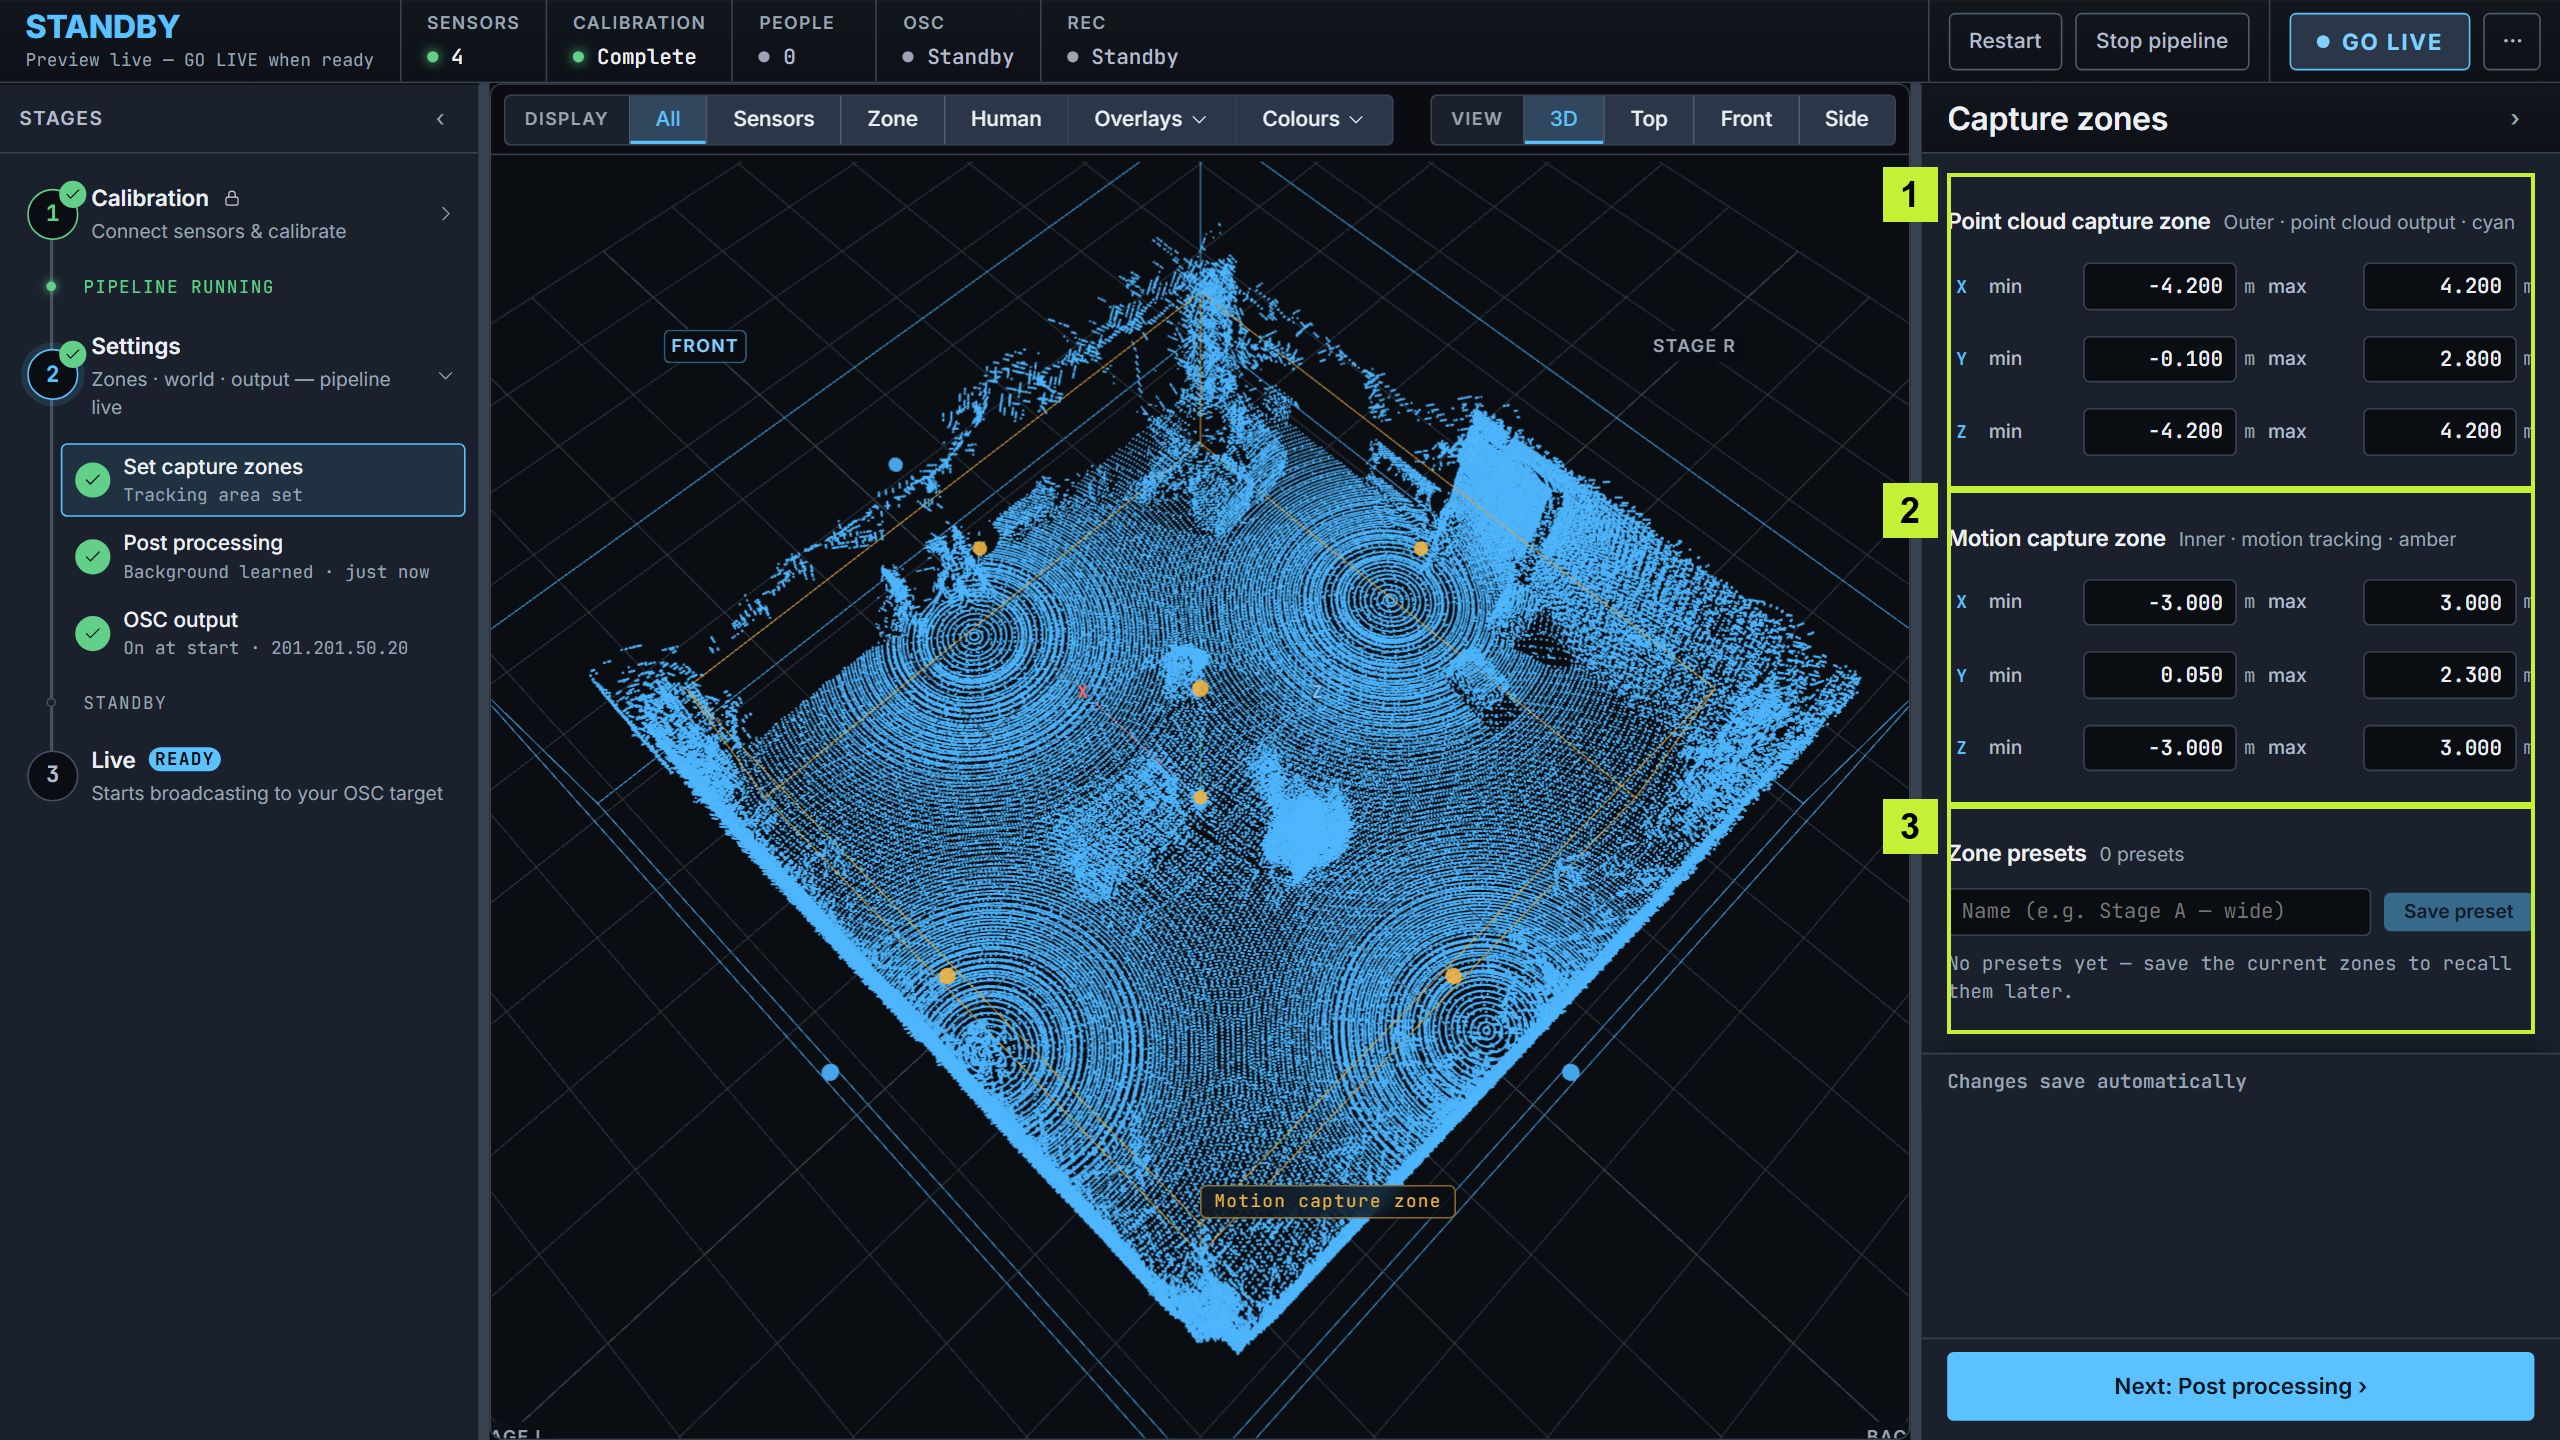
Capture zones over the live point cloud
The two zones over the live scene: cyan (outer) and amber (inner).
  • Point cloud capture zone (cyan, outer) — the volume sent when Source is zone. Enter min and max for each axis, or drag the box in the viewport.

  • Motion capture zone (amber, inner) — the volume used by the human source and motion tracking. It must stay inside the cyan zone.

  • Zone presets — save the layout under a name and reload it for the next show.

If the two zones are exactly the same size, only one box is visible. A note appears with a Pad capture zone button that separates them so you can edit both.

Check the capture area

Values are in meters. Use the viewport's axis labels and Top, Front, and Side views when editing; do not assume screen-left is stage-left — check the axis labels. The amber zone should cover the performer's full height and intended movement area, and stay inside the cyan zone. Changes save automatically.

After learning the background, have one person walk the center and edges of the area. Check that their points remain inside the intended zone and that People responds when they enter. If they disappear at an edge, check the zone bounds and sensor coverage before going live.

Post processing

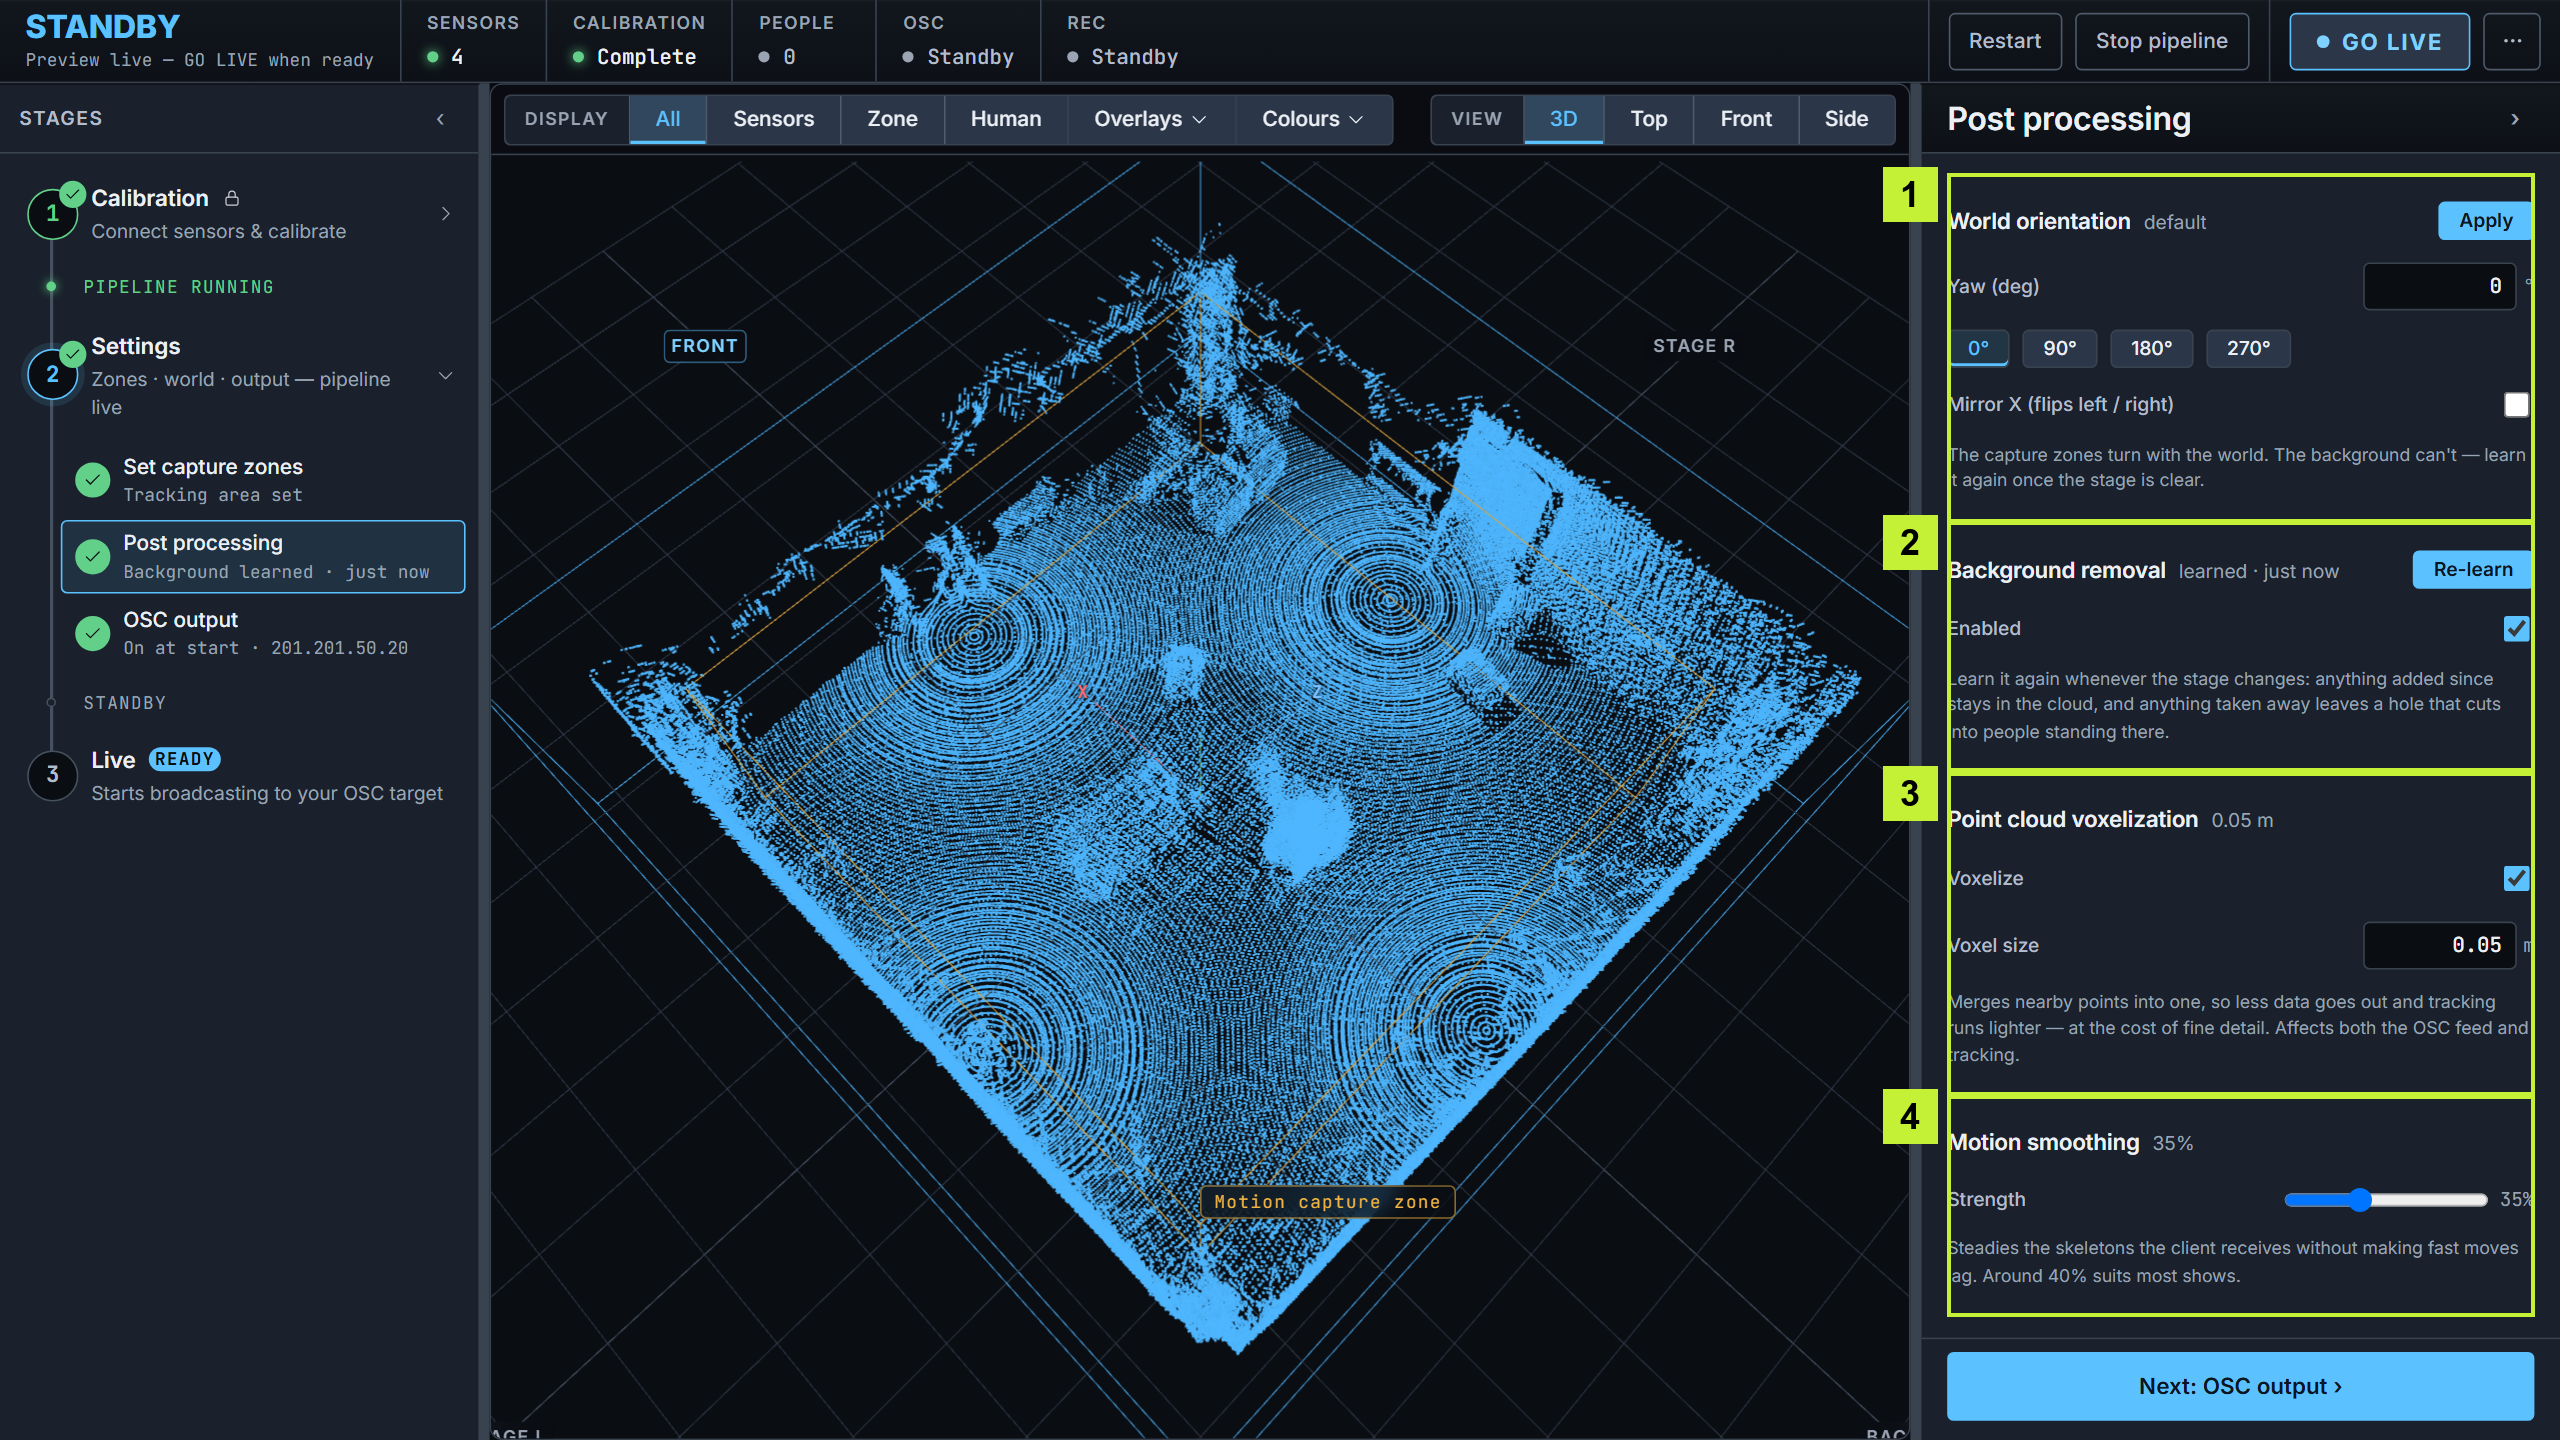
Post processing — orientation, background removal, voxelization, and smoothing
World orientation, background removal, voxelization, and motion smoothing.
Start with Learn the background below; it is required before GO LIVE. If the stage direction needs changing, apply World orientation first, then learn the background in that orientation.

Learn the background

Background removal uses a point-cloud scan of the empty stage. It affects the human source and motion capture, not all or zone.

  1. Clear the stage. Fixed set pieces that belong to the background can stay.

  2. Turn on Remove background.

  3. Confirm the dialog that appears. On a first setup its only button is Learn now. If a background was saved earlier, the dialog offers Use the saved one — take that if the stage has not changed, or Learn a new one if it has.

Learning takes about 10 seconds. Progress appears in the section.

Learn it again whenever the set changes. Anything added afterward stays in the cloud, and a person standing where something was removed loses part of their points.

A Learn now or Re-learn button appears beside the section title only when the background needs attention. To replace a background that is still good, turn Remove background off and on again, then choose Learn a new one.

OSC output

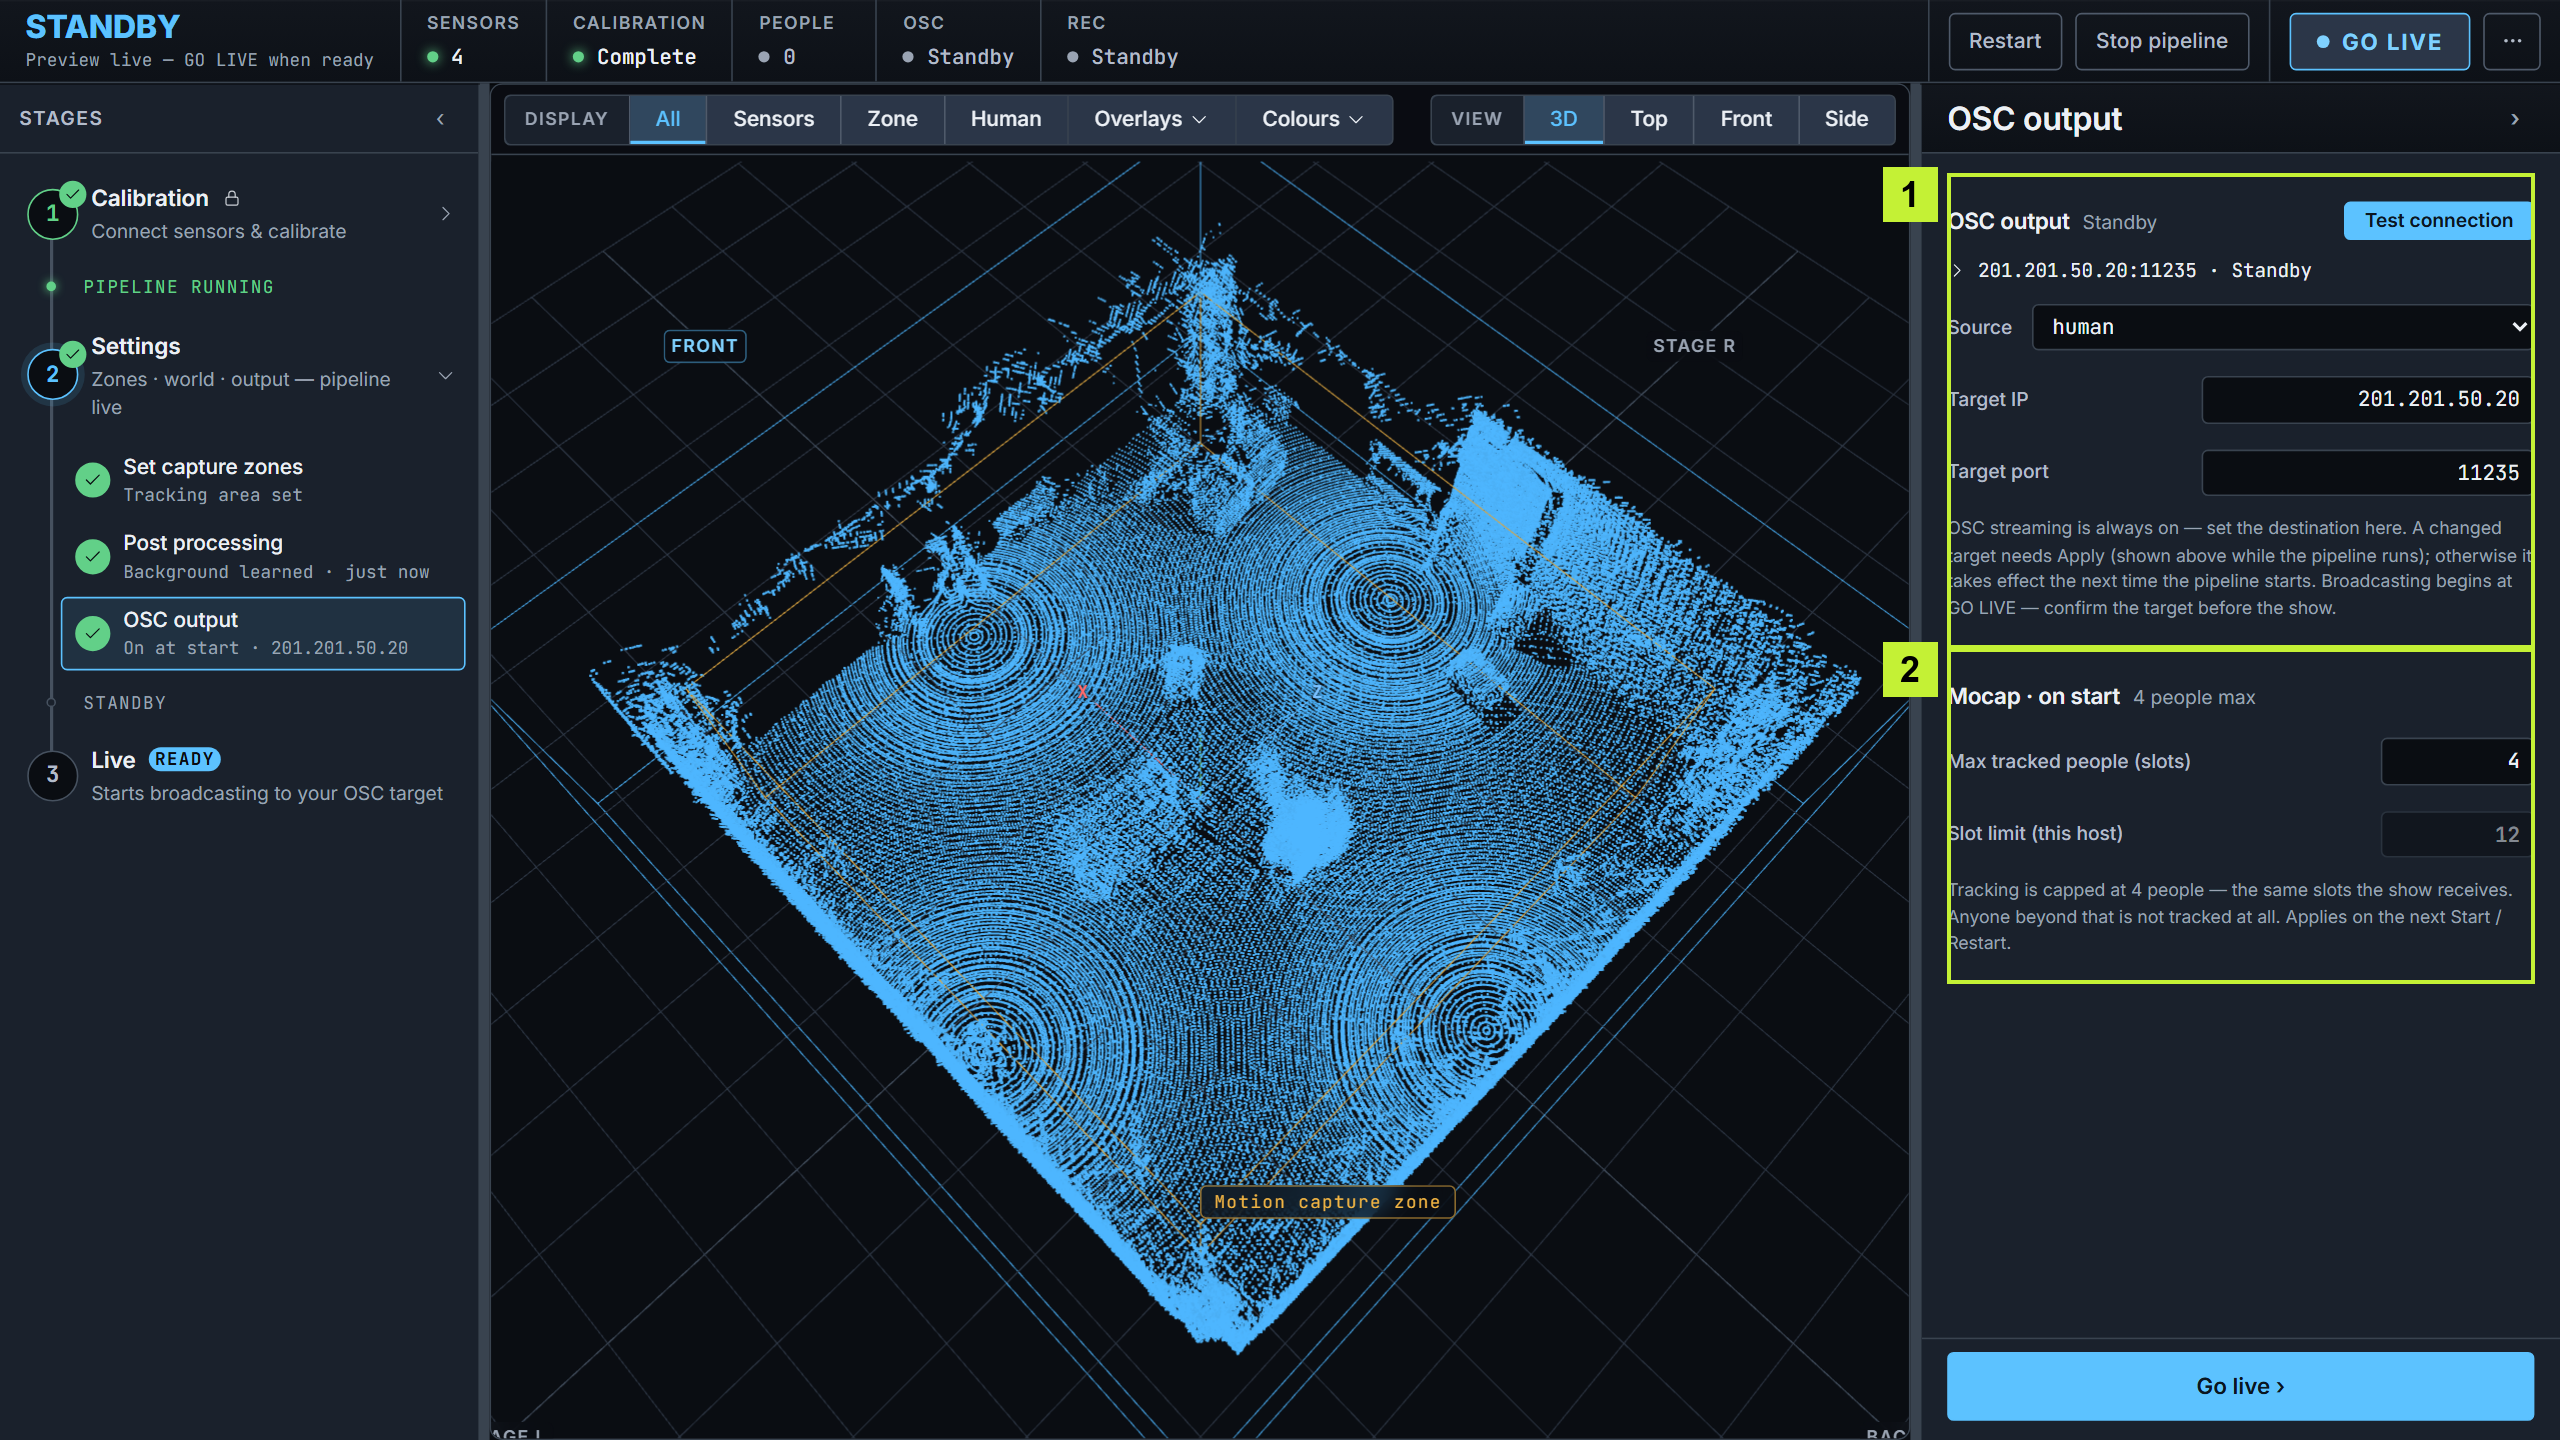
OSC output — target, source, and mocap settings
The streaming destination and source, configured before you go live.

Connect the receiving computer to the server's OSC port with a network cable, directly or through your show-network switch. The LIDAR port is for the sensors only.

  1. Create an OSC UDP input in your receiving application. Enter that computer's wired IPv4 address and the input's port as Target IP and Target port, then select Apply. A Wi-Fi address or localhost will not work, and the computer's firewall must allow the application's inbound UDP.

  2. Select Test connection and look for /movin/test in the receiving application. The test is sent even in preview; show data flows only after GO LIVE.

    • The message appears — the connection works.

    • The computer answered but no message — check the receiving port, UDP input, address filter, and firewall.

    • The computer did not answer — check the IP and cable, but look at the receiver too; some computers block ping while still receiving UDP.

  3. Choose the point-cloud Source:

    • all — the full fused cloud.

    • zone — only the points inside the cyan zone.

    • human — the background-removed cloud inside the amber zone.

  4. Under Mocap · on start, set Max tracked people (slots). The read-only Slot limit (this host) field below it shows the cap for your server. Changes apply on the next pipeline start or restart. Restart briefly interrupts processing and output.

Skeleton data is a separate mocap output — it streams regardless of the source. See OSC message format for the message layout.

If a Mocap backend menu appears here, leave it alone unless your MOVIN support team asks you to switch. A change applies on the next start or restart.

Individual prop tracking is not supported. Props can appear in the cloud and, depending on their shape and the sensor view, can become tracking candidates. Check your actual set and props before the show. A distant or mostly hidden person may also be missed; check coverage and contact MOVIN support if needed.

If you changed the person limit or backend, select Restart in the top bar while still in preview and confirm. Wait for the preview to return, then check People and background readiness.

Optional tuning

Come back to these once the basic setup works. Each applies immediately unless noted.

  • World orientation — rotate the stage (Yaw 0, 90, 180, or 270 degrees) or select Mirror X so forward matches your content, then select Apply. The capture zones turn with the stage. The background does not — learn it again afterward.

  • Point cloud voxelization — merges nearby points to reduce the data sent. Turn on Voxelize and set the Voxel size. In the viewport it shows on Zone and Human only.

  • Motion smoothing — steadies the skeletons your show software receives, with a tradeoff between steadiness and responsiveness. Drag Strength (0–100%). The viewport does not reflect it, so check both slow and fast movements in the receiving application.

Continue to Stage 3 · Live.

Last updated